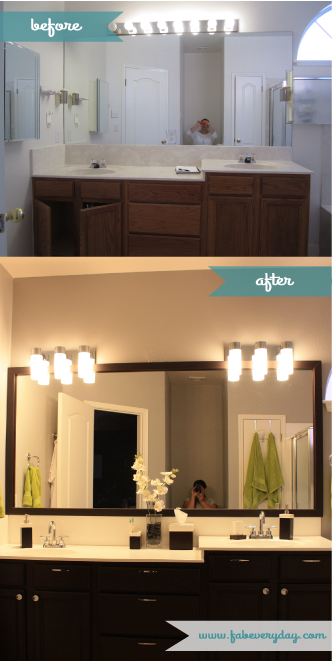
When we moved into our new house, there were a lot of features that were already perfect for us… dark hardwood floors, lovely Carrara marble countertops in the kitchen, crown moulding, and more. What was not so perfect for us were the bathrooms, which still remained pretty standard 90’s builder grade. Luckily, we knew they were nothing that some DIY TLC couldn’t fix! This post is to tell you the steps we took to get our master bathroom from this:
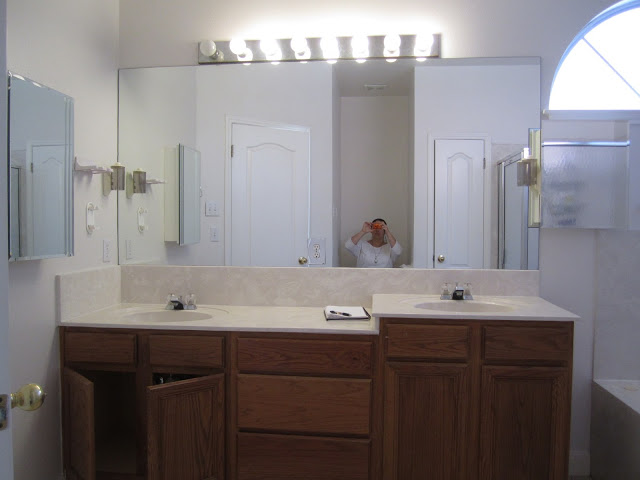
…to this:
without spending a lot of $$$!
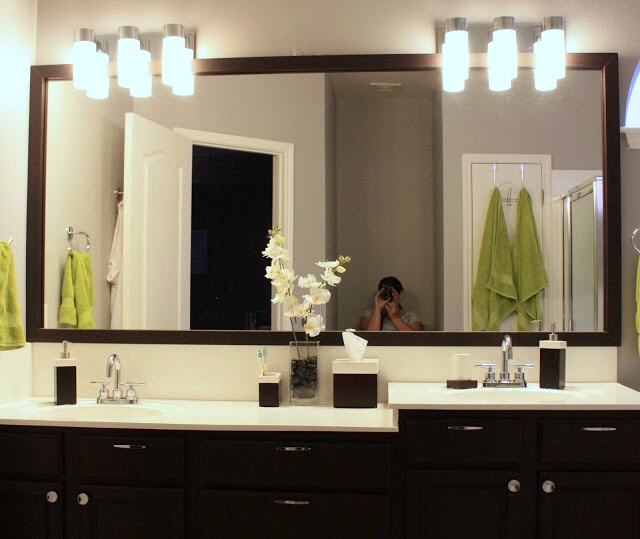
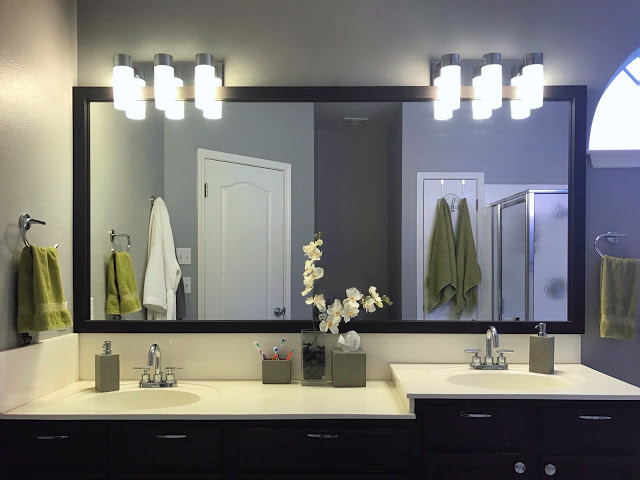
Edited in 2017 to show you what the bathroom looks like now, six years after the makeover:
Disclosure: This post contains some affiliate links, which means that if you click on one of the product links and make a purchase, I may receive a commission. This does not cost you anything additional, and helps me to keep the rest of my content free, so thank you!
Resurfaced countertops: The only thing we paid to do professionally was to resurface the beige, swirly, cultured marble countertops to a plain white. I didn’t want or need to replace the countertops with granite or other stone. I really just wanted them to be plain white, so this was a reasonable option compared to complete replacement.
Frame mirror: A great alternative to purchasing a custom sized framed mirror, is to just add a frame to your existing mirror. Thanks to this post from Centsational Girl, I discovered MirrorMate. MirrorMate allows you to input specifics about your mirror (exact size, distance from walls, sink etc.), choose a style and finish for the frame, and for a great deal, sends you 4 wood pieces and some instructions on how to install your own frame to your existing mirror. A great price, very easy to do, and as you can see above, provides great impact! For this bathroom, we chose Cherokee Slim in Espresso Walnut.
Paint cabinets: We gave the Rustoleum Cabinet Transformations kits a try for this. I have to say, this was very easy and faster to do than the traditional stripping, sanding, and repainting. It does take a full weekend to do all steps, but seems like it took less elbow grease, and turned out beautifully. We opted for the Kona – Unglazed color for this bathroom.
New knobs and handles for cabinets: Hello, Home Depot!
New light fixtures: We found these reasonably-priced, contemporary Hampton Bay 3-Light Vanity Wall Fixtures from Home Depot (which we mounted upside down). It was so nice to replace the long strip builder-grade vanity light fixture with these!

Photo Source: HomeDepot.com
New faucet fixtures: Another reasonably-priced contemporary option for the bathroom were these Glacier Bay Dorset 4 in. 2-Handle High-Arc Bathroom Faucet in Chrome, also from Home Depot. Bonus! They are water-efficient! Lookin’ good, while conserving water.

Photo Source: HomeDepot.com
Wall paint: We painted the walls a gray color to match the tile we loved for the floors (see below). I can’t remember the exact shade we chose. A note on painting: painting is a relatively simple DIY project, but not everyone has the patience or desire to do it on their own. If the idea of painting your bathroom yourself doesn’t sound appealing, you could also find a professional team like Southern Home Services that could easily get the job done for you. There are times when you want a professional’s touch (we did for our home’s exterior paint), or when it can just make the job a lot easier for you (think rooms with vaulted ceilings, etc.).
New tile on floors: Rectangular-shaped Urban Landscape tile in “Silver Lake” from Lowe’s.
Photo Source: Lowe’s
Towels: Green Pure Fiber 3-Piece Viscose Bamboo Bath Towel Set from Amazon. Has held its color and softness amazingly after 2 years!
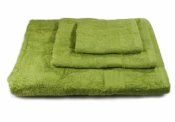
Photo Source: Amazon
Wall accessories: Pegasus line from Home Depot.

Photo Source: Home Depot

Photo Source: Home Depot
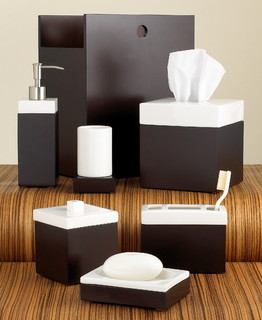
Countertop accessories: Hotel Collection “Standard Suite” Bath Accessories purchased from Macy’s.
Roman tub faucet: Fontaine Delfino Roman Tub Chrome Bathroom Faucet found at a great price from Overstock.com. I was surprised how expensive Roman tub faucets were, so we were happy to find this one.
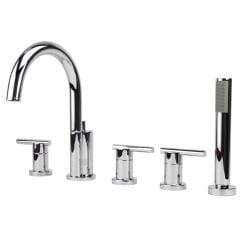
Photo Source: Overstock.com
Shower faucet: MOEN Level Valve Trim Kit in Chrome from Home Depot.

Photo Source: Home Depot
We are now proud to have a bathroom that is “our style” without having to do a major remodel! Perfect example of how one can make their everyday life fabulous. I will share before and afters for our other bathrooms in future posts. Stay tuned!

Jen says
nice work! very pretty
Unknown says
How do you find someone to resurface your counters?
ramonaruby says
I googled counter resurfacing. There is a national chain that does is (Miracle Method, I believe is what they are called), but I ended up finding a more reasonably priced local business that does it.
Papi Cruz says
You did a great job. It looks even better in person.
Elaine Newell says
The makeover looks great. It adds value to your home and I think you and your guests probably feel even more comfortable in it. The light fixtures blend well with the look of the room.
ramonaruby says
Thanks, Elaine!
Ali D. says
I found this on pinterest and I pretty much want to copy this 100% on our new home's builder-grade master bath. Did you remove that medicine cabinet? We have one too and I'm not sure if I'll keep it. Also, do you remember what paint color that is?
ramonaruby says
@Ali, I don't remember the paint color… I think I just found whatever gray paint swatch matched the color of the tile.
Yes, we did remove the medicine cabinet. It just didn't match what we were trying to accomplish style-wise. We use drawer organizers from Container Store in the drawers to use them instead of a medicine cabinet.
Cindy Campbell says
Lovely job! How difficult was it to go from the one strip light unit to the two separate fixtures in terms of re-wiring and such? I have been wanting to do this in our bathroom but am not sure what all is involved. Any advice would be very much appreciated!! Thanks!
Aaron Wanton says
These fixtures look interesting but not sure how can put together a design like this. I have been wanting to redesign my bath room since last 10 months. Any advice will be helpful.
Anonymous says
great job! I always want to redecorate my bathroom with white, grey and black color. Looks tidy!
Jio
ramonaruby says
Thanks @handyfe!
hana says
well done. Thank for sharing your useful information. here is another post
Vanaja Lakshmi says
Nice post http://www.selfcarinsurance.com
Ravesh khatri says
Amazing post.Thanks for sharing among us.
Sarah Johns says
I was fed up with the dull looking interiors in my bathroom, so I decided to install the best tiles to turn the space beautiful and attractive.
Sara Lugo says
Woo, beautiful makeover. I like the idea of having a color coding with the floor tiles. That is a really awesome bathroom remaking ideas. I have read about a blog on bathroom renovation here : bathroom renovations camden haven.
CMR Constructions says
Awesome results and looks done by professional.
Ramona Cruz-Peters says
Thank you so much! That’s such a nice compliment 🙂